The Fury Tank from AnyVape is one of the most advanced clearomisers we have ever sold - and more importantly it produces a great vape! I have seen a few complaints of leaking from users, but that seems to have done nothing to stop its growing popularity.
Update: The Fury Tank is no longer available. See our full range of vape tanks for currently available devices.
 What we like:
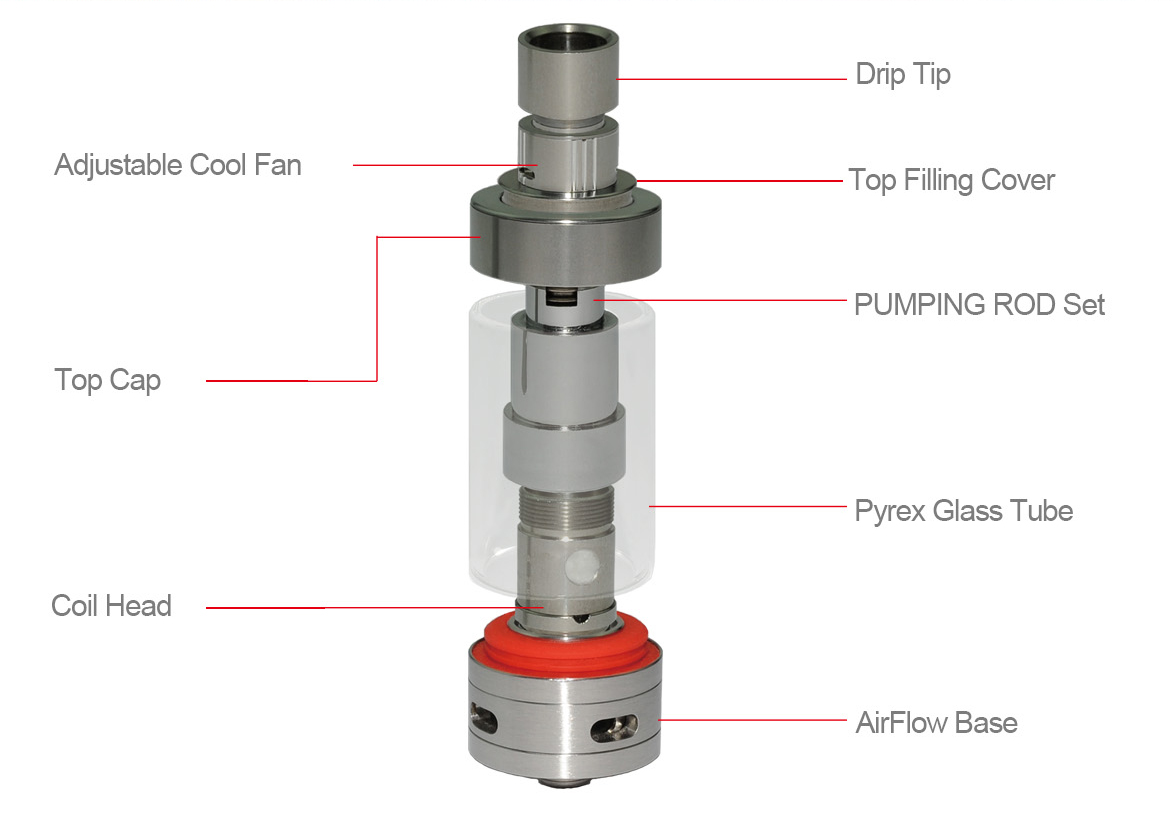
- pump rod filling system for easy top filling
- drip tip air-flow control giving you the option of a smooth, cool and airy vape
- large windows in coils enable easy priming
- cross compatible with a wide range of coils
What we don’t like:
- leaks if not filled carefully
- care needed when attaching pyrex tube to base to ensure threading is not broken
- drip tip airflow control is a bit loose
Who’s it for
This is definitely not a device for beginners. However, it is ideal if you are a good intermediate/advanced vaper who is interested in power, cloud vaping, great flavour and ultimate air-flow control.
Take Care
You DO need to be careful when screwing the base of the tank onto the pyrex tank. There’s no automatic stop, and if you screw it in too hard you will damage the threading.
Coils
Bottom Scissors Dual Coil Atomiser
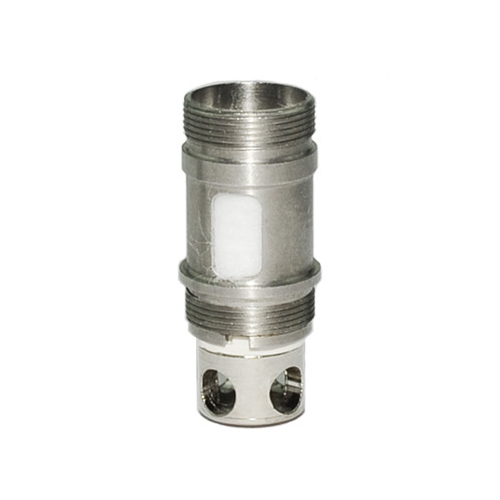
AnyVape is very proud of its Bottom Scissors Dual Coil (BSDC) atomiser, which comes as standard in the Fury Tank. As far as we can work out, the design is designed to maximise the coil surface area exposed to e-liquid. While it is a solid, good quaity coil, we can’t make out much difference between a scissor coil and an Aspire Coil.
It certainly works, as the tank provides excellent vapour production.
Spare RDA Sega Coil Head
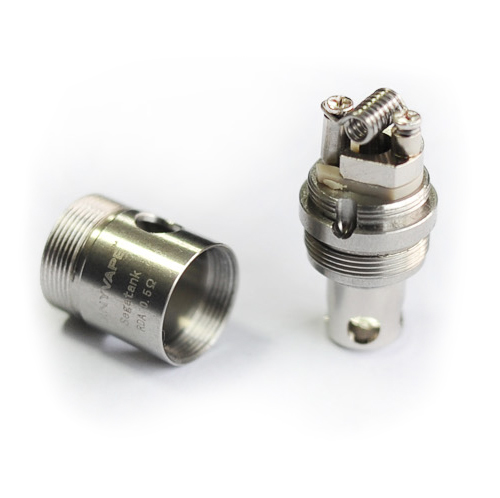 The coil head boasts organic Japanese cotton, Kanthal wires, a pre-wired 0.5 ohm coil, 4 air holes and PEEK insulating material. (Peek is a high performance thermoplastic with excellent chemical resistance properties).
Priming
We advise priming with all clearomisers, but it’s especially important when using sub-ohm devices.
Fortunately, the Fury tank makes this easy with large windows opening up onto the cotton. Drip the e-liquid onto the cotton in these windows (until saturated) and from the top. Failure to do this is likely to lead to the coil burning out.
How to Fill
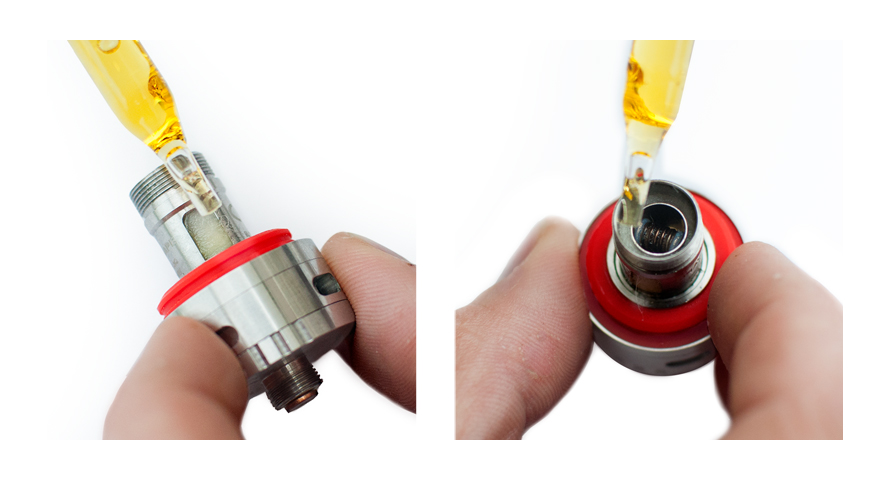
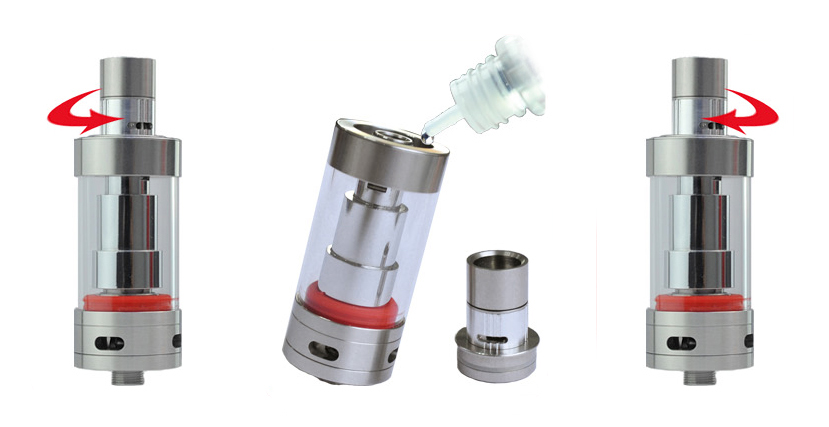
How To Top Fill
At last - a clearomiser which doesn’t require battery and base removal before filling! The Fury Tank is the first tank I’ve used for years which enables you to simply and easily fill the tank from the top.To fill, grip the drip tip (make sure you grip the bottom part of the drip tip, the section which has the second air-flow control) and rotate anti-clockwise. As you do this, the pump rod kicks into action, blocking off the holes in your coil to ensure your atomiser is not flooded. Then drip the e-liquid down the sides, taking care not to get any e-liquid down the center tube/chimney.
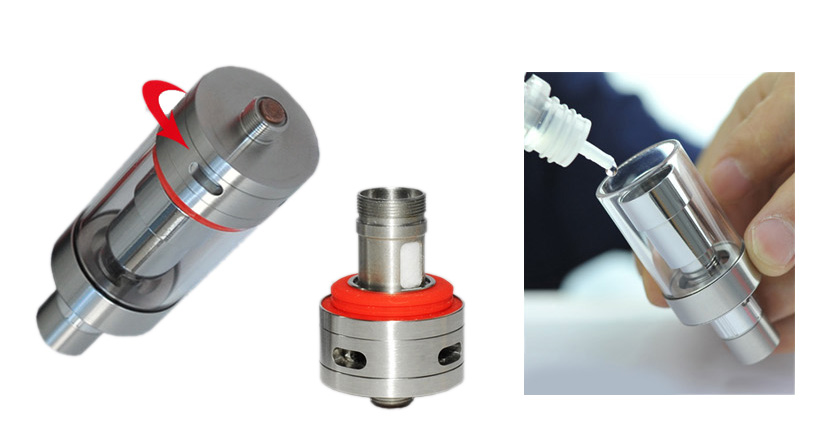
 Bottom Filling the Fury
As with our other clearomisers, remove the clearomiser from the battery. Unscrew the base, and carefully drip the e-liquid down the sides of the tank, avoiding the center tube.
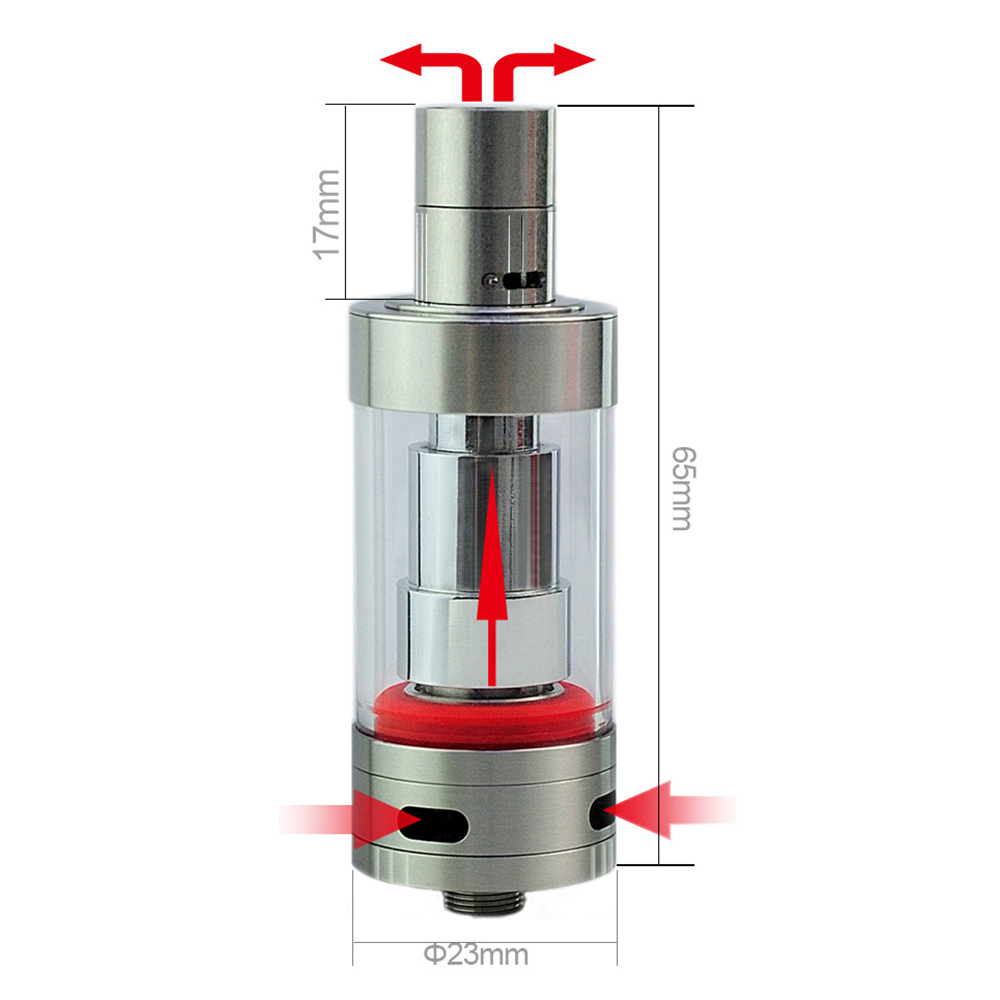
Dual Airflow Controls
I love the additional air-flow controls that you get with the Fury, and they can make a real difference as you ramp the wattage up. In fact, with the wattage turned up and the top airflow controls closed, the vapour can get quite hot - open the top airflow controls and you’ll instantly get a cooler vape.
The bottom airflow controls also give plenty of control, with four holes giving a total airflow capability of 6mm.
Replacing the Coil
Replacing the coil is exactly the same process as our other clearomisers. As mentioned, this is a device for intermediate/advanced users, so you really shouldn’t have a problem, but just in case you have decided to jump into the deep end, here’s what to do:
- Unscrew the tank from the battery.
- Hold the tank upside down.
- Unscrew the airflow control from the tank.
- Unscrew the coil from the base.
- Replace with a new coil.
- Prime the coil as described above.
- Screw the airflow control back into the tank.
Compatibility
The Fury Tank is compatible with a number of coils, including Atlantis Sub Ohm Coils. The Fury Tanks BSDC is also compatible with the Triton coils and soon to be released ni200 coils. In short, all 3 tanks are cross compatible with their range of coils.
Have you used the Fury? Share your experiences with us in the comments below!