
Smok Alien 220 Mod: Review and Tutorial
Update: Unfortunately, the Smok Alien is no longer available. To see the full range of current devices, see our Smok brand page.
The Alien 220 Mod from Smok is a widely popular device, largely due to an array of features, lots of power, and the slightly quirky (and much improved over the X Cube) side firing button.
In this tutorial we'll cover key Smok Alien features, how to use it and what we like and dislike about the device.
At A Glance
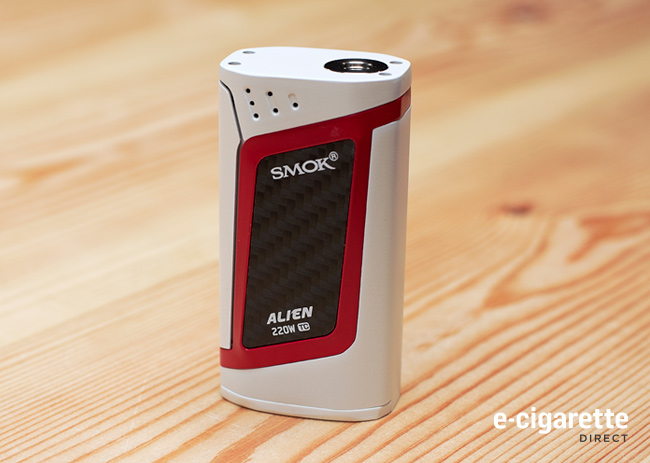
The first thing you’ll notice about the Alien is probably the weight. It’s a heavy thing, but then that brings with it the feeling of sturdiness. Despite being rather a lump, it does fit nicely into the hand.
Okay, maybe what you’ll actually notice first is the shape. Although it is very much like other boxes in its boxiness (that’s a real word!), it does have rather a pleasing roundness to the sides. This makes it a lot more comfortable to hold than many similar devices on the market.
Next thing you’ll likely notice is the large OLED screen. It’s slightly overwhelming at first, as it packs in a lot of information. But once you’ve sussed out what everything means (it is all labelled well), you can tell the vast majority of any information you might need at a glance.
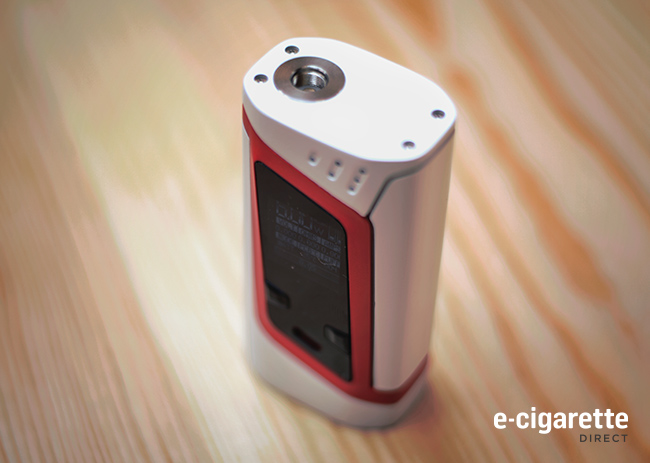
Having the usual spring loaded 510 connector, up and down adjustment buttons on the face (oddly down is higher than up due to the parallelogram design on the front and back), and the firm side firing button, you won’t find the Smok Alien difficult to run.
Alien 220 Features
- Dimensions: 85mm by 44mm by 30mm
- Wattage Range: 6-220W
- Min Atomizer Resistance: 0.06ohm
- Temperature Range: 200-600F
- Ni200 Nickel, Titanium, and Stainless Steel TC Settings
- Side Firing Button
- Zinc Alloy Construction
- Highly Detailed OLED Display
- Series Battery Configuration
- Dual Battery Life Indicator
- Hinged Battery Door
- Firmware Upgradeable
- User Memory Mode
- Manual Resistance Adjustment
- 510 Connection
How to Use The Smok Alien
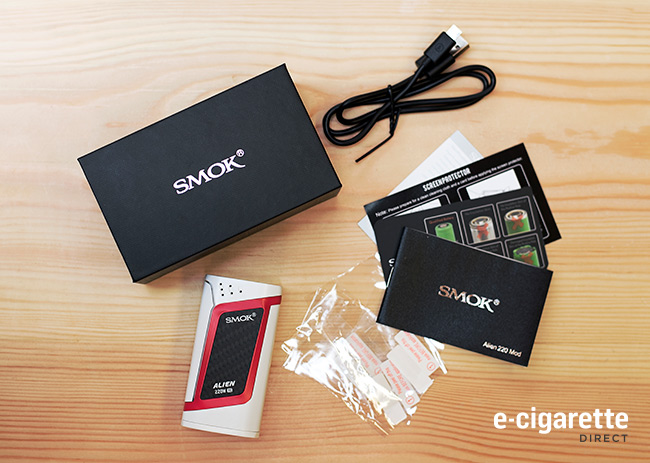
Installing Batteries and Switching On
Firstly slide off the battery door on the base of the Smok Alien, then insert as indicated on the inside of the door, and inside the device itself. (i.e. Insert the first battery positive first, the second battery negative first). Then press the side firing button 5 times in quick succession to turn on.

Initial Simple Usage
Attach your tank/atomiser, and the display will ask if it is a new coil. If you’re returning the same tank/coil to the device click the down button indicating N for no.
If it’s a different tank, or you’ve changed coil, select the down button indicating Y for yes. Once you’ve installed the tank on the device, simply adjust the wattage or temperature to suit.
Fast Mode Selection
Pressing the power button and down together momentarily will access the mode selection, allowing you to choose between wattage, temperature and memory mode.
Fast Effect Selection
Pressing the power button and up together momentarily will access the effect selection. This allows you to choose norm/soft/hard ramp up in wattage mode, wattage within temp mode, and specific user settings within memory mode. (Ramp up time refers to the speed at which your coil heats up.)
Locking and Switching Off the Smok Alien
Click the power button five times to lock, then hold for 5 seconds to fully switch off. All settings will remain intact when turned back on.
Detailed Mode/Effect Selection
Clicking the power button 3 times will access the more in-depth menus for mode, puffs, settings and power on/off.
The up and down buttons scroll between the further options (or a single press of the power button), then if you hold the power button it will select the highlighted option. I’ll skip the power off option, as that speaks for itself.
Mode: The first selection you can make in the mode category is either watt/temp/memory. As an example I shall run through setting up a stainless steel coil in temp mode.
First, click the power button three times to access the main menu. Then hold it down for a second to select the mode, where you select temp from the temp/watt/memory options. Next you can select wattage strength, setting this higher means you will hit the max temp set faster.
On the next menu you can choose the material of your coil, SS/NI/TI being the options, then on the final screen you can adjust the coefficient of resistance. Differently rated materials heat and change resistance slightly differently, so this option allows you to adjust settings to suit the particular type of coil you have.
Most production coils will use 316L grade SS (a surgical grade), but for those making their own coils knowing the slight differences here could be an advantage, (Remember folks, Google is your friend!)
- Stainless Steel SS316L/317L: 0.00094
- Stainless Steel SS 304: 0.00105 - 0.00104
- Stainless Steel SS 316: 0.00094 - 0.00091
- Stainless Steel SS 317: 0.00088
Puffs: This is your puff counter/limiter option, with a slightly less confusing two layers of options.
First you can limit your daily puffs up to a max of 999, or simply not count them by selecting ‘Never’. After that you have the option to reset the puff counter, with a simple Y/N selection.
Settings: This section deals with screen settings, manual Ohms adjustment and firmware upgrading.
First, click the power button three times to access the main menu, then scroll to select the Settings menu, then take the following steps for each sub menu.
Scr Time: The first sub menu allows you to switch Stealth Mode on or off, selecting Y/N as appropriate. After this you have the screen timer, selecting between 15-240 secs of time before the screen goes black.
Scr Lock: Here you are given the option to select Y/N, allowing you to auto lock the device as the screen goes off.
Contrast: Naturally enough, adjusts the brightness of the screen. Simply select from 10 (dim) to 100 (bright).
Manual Ohms Adjustment: This is one that has puzzled us at Ecigarettedirect, owing to the fact that Smok hasn’t seen fit to tell anyone what the aim of this function is… What it seems to be, is a way of adjusting the resistance of a stainless coil (which can be used in wattage or temp modes), when it is warm, so that the device fires it correctly once put into temp mode.
If the base resistance is known to be 0.257 Ohms (as mine is), you’ve vaped in wattage, unscrewed the tank, placed it back on and select “New coil? Y”, your resistance now shows higher due to having been heated. You can then adjust it back to the original resistance rating, so that the device will give you an accurate temperature when fired in temp mode.
In testing, I have found that the scope of the adjustment is fairly limited. Having screwed the tank back on, with the resistance reading at over 0.3 Ohms, I couldn’t adjust low enough to give a true reading. As such I feel that it’s rather a redundant feature. In fact, if you allow your coil to cool for several minutes before screwing it back on, the Alien will read the correct resistance without you having to go through the settings.
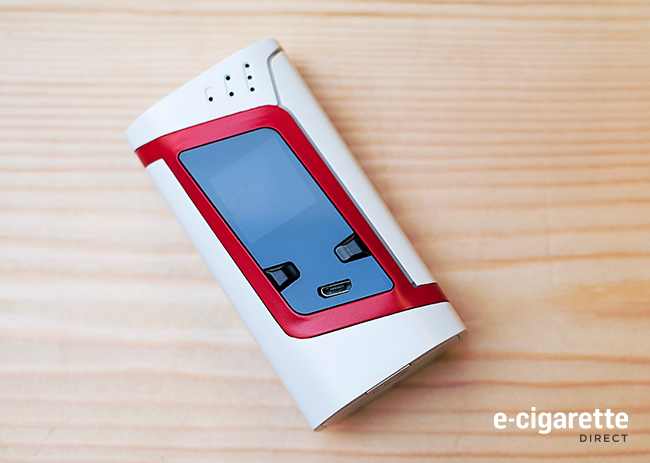
Finally within the settings menus you have download, which allows you to update your firmware via your PC/Laptop.
To upgrade your Firmware, you will need visit Smoktech.com. This link will take you to the list of downloadable firmwares. Make sure you select the right version. Once you get the correct version you'll find both the download and the full instructions.
Sorry Mac users, the Smok Alien upgrade link currently only works on PCs.
What We Like:
- Solid construction
- Ergonomic styling (feels great in the hand)
- Smok's best side firing button yet (a slight resistance when pressed, limiting accidental firing)
- Upgradeable firmware, so when Smok improves features, so can you.
What we don't like:
- Too heavy and bulky for some
- Menus all being under the fire button (can be confusing at first)
- Manual Ohms adjustment (doesn't seem to be very useful)