Update: The Mini Quest has now been discontinued. For a round up of current best devices, see Best Vape Kits and Best Vape Mods.
The Quest Mini kit is a new option for anyone who wants to move to sub ohm, temperature-controlled vaping.
Based around mini versions of the popular Pegasus box mod and Triton 2 tank, it has everything you need except a battery and juice in a single box.
In this post you'll find get an overview of the Quest (including what we like and don't like) and clear instructions on how to use it.
If you've entered the competition, please check your email to see if your the third lucky winner!
Contents:
What we like:
- Comfortable shape
- Lightweight
- Clear, bold screen
- Simple menu
- Floating 510 pin
- Leak-free tank filling mechanism
- Good choice of coils
- Great build quality
- Nicely finished
- TC sub-ohm vaping in a single box
What we don't like:
- Clunky lock/standby process instead of a real on/off function.
- No way to lock in your settings
- Takes a while to scroll through temperature settings
- Small (but TPD-compliant?) tank
Overview
This kit is fully up to date, with compact versions of two popular Aspire products. It has lots of features and plenty of performance, making an ideal introduction to both TC and low resistance tanks – and it has plenty to offer more experienced vapers too.
What’s in the Box?
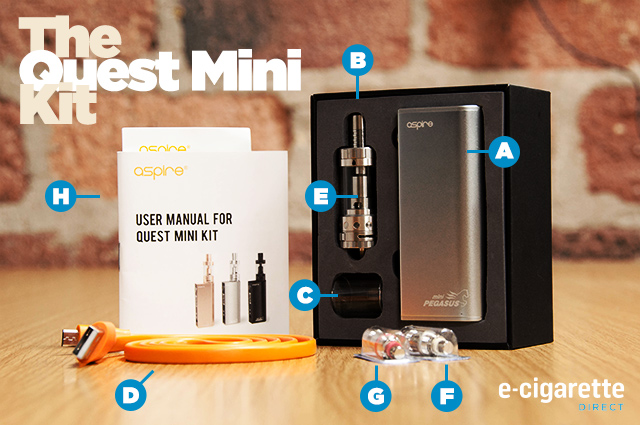
- A. 1x Pegasus Mini TC mod
- B. 1x Triton Mini tank atomiser
- C. 1x Spare Pyrex tank
- D. 1x Micro USB charging cable
- E. 1x 1.8 ohm Clapton coil (pre-installed)
- F. 1x 1.2 ohm kanthal coil
- G. 1x 0.15 ohm Ni200 coil
- H. Instruction leaflet
Pegasus Mini
Features
- Variable wattage (1.0W – 50W in 0.1 watt increments)
- Temperature control with Ni and Ti modes (200-600°F, 100-315°C)
- Sub-ohm capable – handles resistances from 0.1-3.0Ω
- Replaceable 18650 battery
- 5-click lock/unlock
- Stealth mode
- OLED display
- Passthrough charging – vape while it charges
- Auto-flipping screen
- Stainless steel 510 connector with floating centre pin
- Extensive safety features
There’s a lot in this kit and it’s all excellent quality, making it a real bargain at £59.99. It’s perfect if you want to upgrade from an entry-level device, or if you’re looking for a compact but powerful setup to use when you go out.
The Design
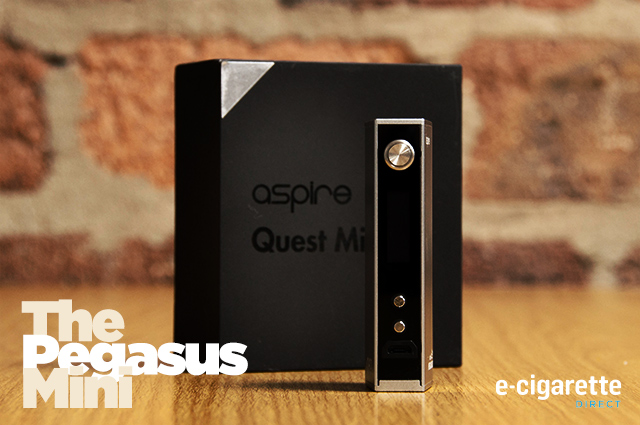
If you’re already familiar with the Pegasus, the Mini won’t hold any surprises – it’s the same thing, only smaller. This is a slim box mod with a slightly tapered profile. The back edge is rounded, making it very comfortable in the hand, while the front holds the screen, charging port and all the buttons.
It’s as light as it is slim, too. The casing is made of nicely brushed aluminium, with satin-chromed top and bottom caps. The top cap is metal and includes the 510 connector, which has steel threads and a floating pin. The bottom cap seems to be some kind of lightweight alloy. Finish on all parts is classy-looking, but not glossy enough to attract fingerprints and scratches.
The front of the Mini Pegasus is black plastic with a transparent insert for the screen. Above the OLED display is the fire button, which is steel with a matching surround. It’s nicely clicky, so if you like tactile feedback you’ll be happy here.
The screen itself is big, bright and bold. It shows all the details you need, including battery status, coil resistance and voltage as well as the current settings. One unusual feature is that it has an accelerometer, and automatically flips so it’s always the right way up however you hold the device.
If you’ve seen a full-size Pegasus you’ll notice one major difference here. Instead of the top-mounted wheel for adjusting settings the Mini reverts to more conventional buttons, mounted just below the screen. Like the fire button, these are steel and give nice feedback.
One slight concern with the design is a lack of venting – there are no holes anywhere in the case. However the base cap doesn’t need much force to remove, so if the battery does start venting (and that’s unlikely with the range of safety features built in) the base should pop off before the pressure reaches dangerous levels.
Fitting a Battery
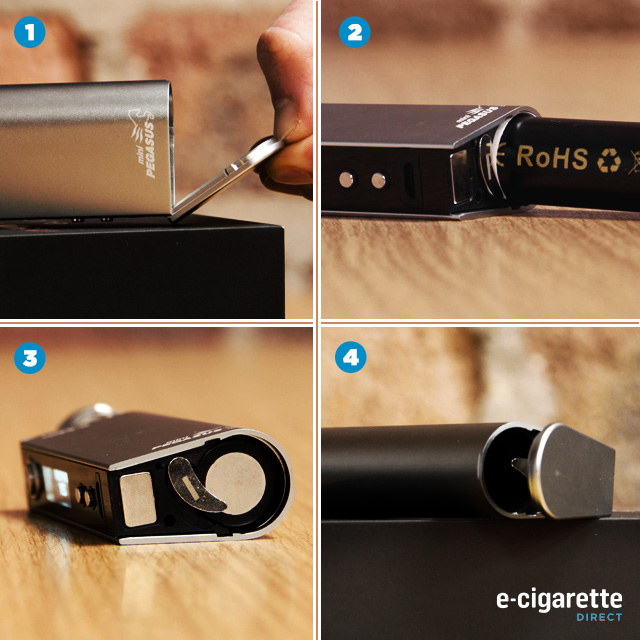 Following the current trend, the Pegasus Mini uses a removable battery. In this case it’s a single 18650. You’ll need a high-drain IMR battery that can deliver at least a continuous 25A current.
- The base of the mod is held in place with a magnet and is easy to remove – just pull down on the rounded end. This will reveal the battery compartment.
- Drop your battery in positive end first.
- Just beside the battery compartment is a small metal arm shaped like a comma. This is the negative contact; swing the narrow end out so it can make contact with the battery’s negative terminal. This will hold the battery securely in place and also completes the circuit, turning the mod on.
- Finally, just replace the base cap – it will snap securely back into place.
Charging the mod

Because the battery is removable you can charge it in a normal charger such as the Nitecore Intellicharger, but there’s also a Micro USB port on the front of the mod. This works as a pass-through, so you can vape while it charges, and because the port is front-mounted you can stand it upright. Charge status is shown by the battery icon on the display.
Please note: Charging with an incompatible adapter is dangerous. Only use the cable supplied with the Pegasus Mini. See our battery safety infographic for useful tips.
The USB cable that comes with the kit is worth a mention. It’s an orange ribbon-style cable, about three feet long – so no problems with passthrough vaping – and feels very high quality. The connectors slot securely into place at both ends, too, unlike some you’ll find.
Switching On and Off

The mod will automatically power up when a charged battery is fitted. Once it’s powered up you can’t really switch it off as such, but you can lock it with five quick presses of the fire button. It will go to sleep about a minute later.
You can bring it out of standby mode with three rapid clicks, then unlock it with five more.
This is a bit clunky, and a more standard five-click on/off function would probably be easier to live with, but how often do most of us actually turn our mods off? It’s a gripe, but not a major one.
Selecting modes
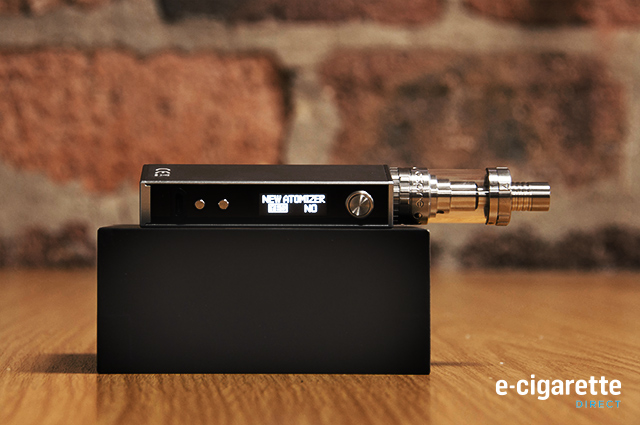 When you fit an atomiser to the Pegasus Mini the screen will display NEW ATOMIZER with YES and NO underneath. Use the up and down buttons to select.
If you choose YES it will then display three more options – Ka for kanthal, Ni for nickel and Ti for titanium. Again, use the up and down buttons to set it to the coil you’re using.
If you select Ka the device will automatically switch to VW mode and ask you if you want Bypass or Regulated mode. For most vapers Regulated is fine.
Finally it asks you to confirm your choice, and then it’s ready to go.
If you choose Ni or Ti it will set up the appropriate temperature control mode and ask you to choose between °C or °F. Next it asks if the coil is at room temperature, and finally for confirmation.
If you choose NO when asked if it’s a new atomiser it will keep the last settings you entered. 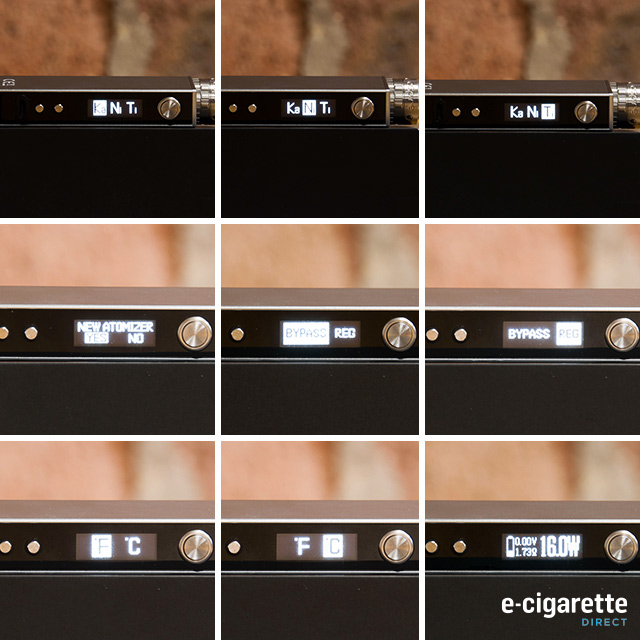
Adjusting power in Variable Wattage mode
If you’re running a kanthal coil you can change the power in 0.1 watt increments by clicking the up and down buttons. Holding a button will scroll up or down until it’s released; if you hold for more than a second the scroll rate will increase.
One small drawback here is that there doesn’t seem to be any way to lock in the power. The lock function disables the fire button, too, so it’s possible for it to get knocked off your settings.
Maximum power output is 50W, compared to the 70W of the full size Pegasus.
Adjusting temperature in Temperature Control mode
This works exactly the same as adjusting power; just press the up or down buttons to adjust in 1° increments, and hold to scroll. The 1° intervals mean it can take a while to scroll through the whole range, but you do get very precise control of the vapour temperature. Again, you can’t lock in your settings.
Clearomiser Compatibility
The Pegasus Mini will take any atomiser with a standard 510 connection. It doesn’t have eGo threading, but if you want to use an eGo-compatible clearo you can pick up an adapter. This device is more suitable for a modern tank, though; eGo-style clearos can’t make use of either its power output or TC capability. You won’t go wrong with the Triton Mini included in the kit.
Safety Features
Aspire have spent a lot of time making sure this device can be used without worries. Safety features include short circuit, overheat and reverse polarity protection. It will also let you know if resistance is too high, and it cuts out automatically after firing for twelve seconds.Low battery protection kicks in when your charge has fallen to 3.3V. The common safety issues with sub-ohm vaping all seem well covered.
Triton Mini
Features
- 18mm diameter
- 2ml capacity
- Pyrex glass tank
- Leak-free top fill mechanism
- Two-slot adjustable airflow control
- Silver-plated contact
The Design
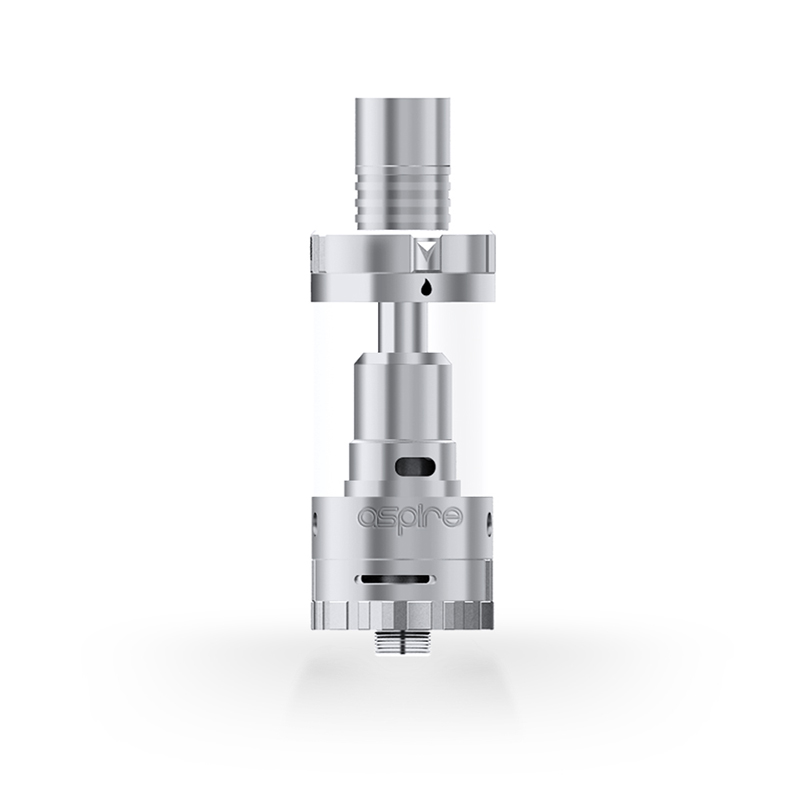
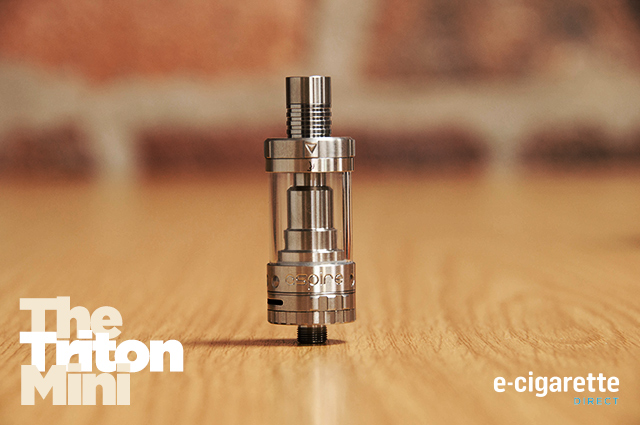
Aspire’s new Triton Mini is a scaled-down version of the Triton 2. It does feature some improvements over the full size triton, as the larger fill holes means the e-liquid does not pool at the top of the clearomiser.
The design is quite standard for a modern atomiser – a Pyrex tank between top and bottom sections held together by the coil and chimney. There’s an airflow control ring with two slots at the base, and a top ring opens the filling port and can also be used as a liquid flow control.
The two filling ports are concealed under the drip tip base, which comes with a short wide-bore tip already fitted. You can replace that with a standard one, but it’s quite small diameter and you might have problems finding one that looks good. The stock one is fine, though.
This is a small tank, but it delivers full-size performance. There’s plenty of airflow with the slots fully open, and the little coils seem to work just as well as the full-size Triton ones.
What’s interesting is that Aspire seem to have had the upcoming TPD restrictions in mind when they designed it. Its 2ml capacity is the one real weak point in the design, but it does make it one of the few sub-ohm tanks that complies with the new law. The filling mechanism also seems compliant – it would be hard to make it leak while you top up.
Unless the eurocrats decide to nail it for not being tamper-proof we could have our first decent post-TPD atomiser here.
Changing the Coil
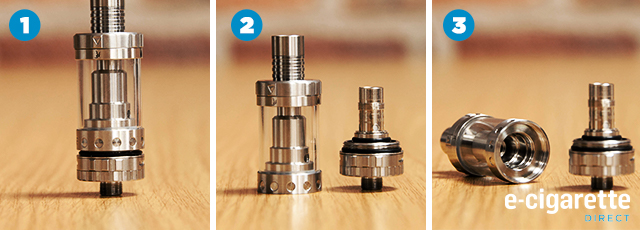
It's simple to change the coil.
Just hold the base above the airflow ring and unscrew the tank and top cap. Watch for the O-ring in the base – it sometimes sticks to the tank and comes out with it. If it does just moisten it with a drop of juice and push it back into its seat in the base.
Don’t lose it – there aren’t any spares supplied with the kit. Once the tank is off you can unscrew the old coil from the base and screw in a new one.
The heads are smaller than the standard Triton ones to fit inside the Mini’s narrower chimney, but they don’t seem to lose much in performance. They also seem to be compatible with Aspire’s Nautilus coils.
The heads have colour-coded gaskets to tell you what kind of coil is in there. Those with red gaskets are TC, a yellow gasket means it’s a Clapton coil, and clear indicates standard kanthal. There’s also an optional RBA kit if you like winding your own.
Filling the Tank
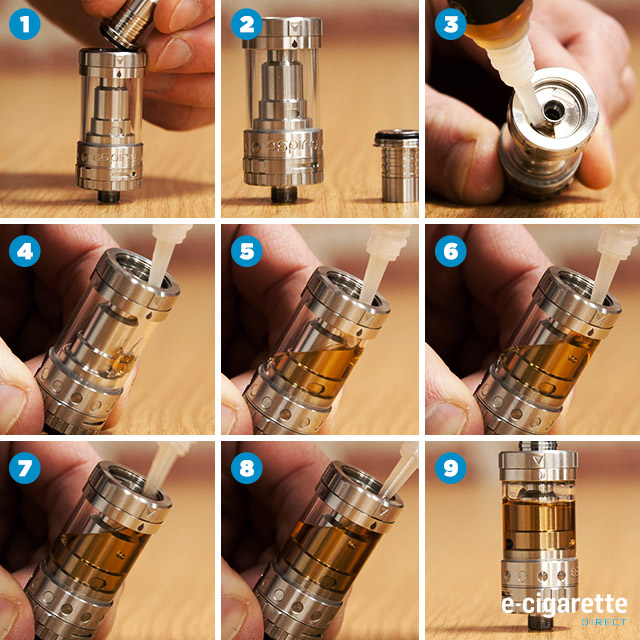
The Triton Mini has a beat top-filling mechanism that should eliminate any leaks. If you look at the top ring of the tank there’s an arrow on it, and on the section below are two small icons – one showing someone vaping, and the other a drop of liquid. To refill just twist the ring until the arrow lines up with the drop.
That does two things: It closes the juice holes at the base of the chimney so the coil can’t flood, and it opens the filling holes. To access the holes unscrew the base of the drip tip and remove it; the open holes are underneath. Fill the tank, replace the tip base and twist the ring back to the vaping icon.
Adjusting Airflow
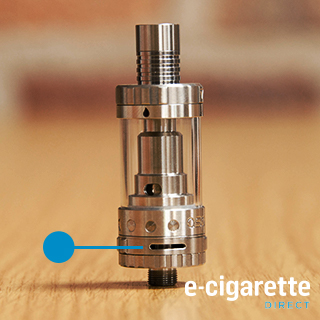 There are two airflow slots on the base, controlled with a ring. Just twist it until the slots are as open or closed as you prefer. They’re quite small anyway though, so closing them down much gives a fairly tight vape.
Products featured in this tutorial
Aspire Quest E-Cig Kit
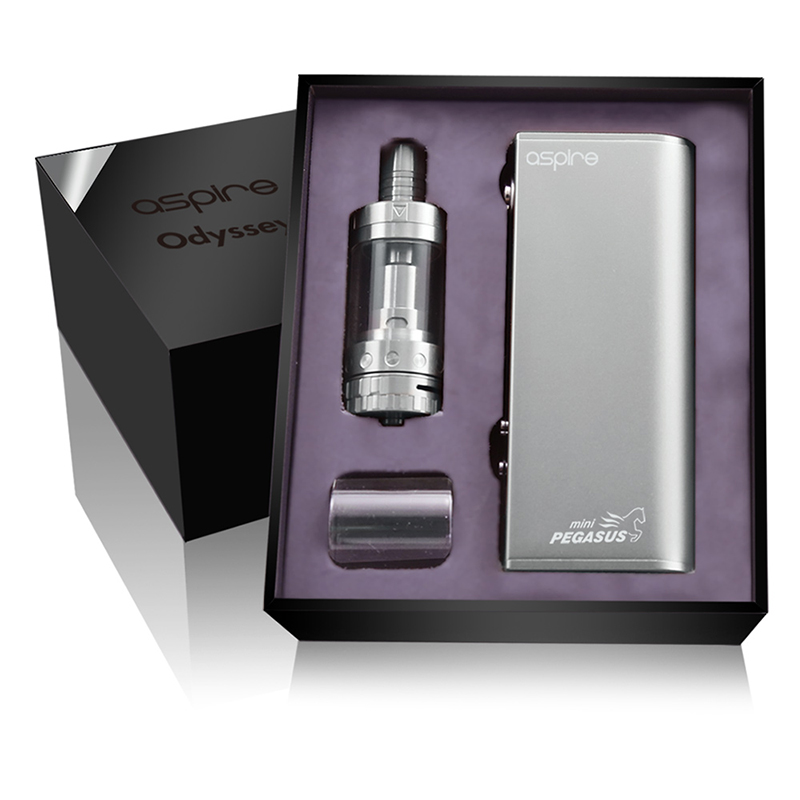
Aspire Triton Mini Clearomiser
